Saturday, November 29, 2008
Qt anounced for S60 !
Trolltech has anounced the release of qt for the popular nokia s60 devices. But its only for 3rd generation series.
http://trolltech.com/about/news/qt-for-s60-announced
There is a Technical preview release available at
http://trolltech.com/developer/technical-preview-qt-for-s60
The best thing about Qt is, same code runs on
1)Windows
2)Linux
3)Mac OSX
3)Linux embedded
4)Windows CE
4)S60 3rd generation mobiles (now)
There are java bindings available for java developers
I Love Qt :D
Wednesday, November 26, 2008
Beagleboard angstrom/openembedded !
Finally i got my hands on this cute little 3x3 arm board :) .
i got the angstrom image build and running on the board . As of now i dont have a Dvi-D monitor, im connecting through vnc and playing with the board for now.
The following video showa the enligtment desktop running on beagle and the display is connected through vnc . :)
http://www.youtube.com/watch?v=fQe6HRRt8FE
Sunday, October 12, 2008
Head Tracker using OpenCV Qt4 and OpenGL
Recently i have heard about ps3 face tracking capability in games. Then i have came across around some videos at youtube regarding this technology. There are many related to OpenCV which is a Image processing library from Intel. So i have written a small Head tracking application using haarcascades in opencv for detecting face and tracking; and Qt4 for the gui; and opengl for rendoring.
Its very imature and lots to improve on. As for now it wont be able to track if you bend your head too much or turn too much. I need to learn alot about OpenCV and work on this more.
Possibilities by using this can be many. Integrate into a opengl 3dmodel viewer which rotates as you move your head to get a 3dviewing feel :). You can easily control mouse on a PC , so if u can able to write a module which can be integrated into current pc games like Counter Strike :D It would be great :).
Youtube Video link
http://www.youtube.com/watch?v=tje_a8_KNrE
Friday, September 19, 2008
MINIGUI on psplinux
I got minigui running on the psplinux. Minigui runs on frame buffer and is being used for embedded gui. I was trying to get qt-embedded which also runs on framebuffer, but has much more features and api than minigui, the compilation went fine till linking stage and iam getting some (R_MIPS_CALL16 R_MIPS_GOT16 errors). I did a bit of google and found that these errors are related to ld scripts and memory locations. I was unable to get these problems solved.
Here is a link to the youtube video
http://www.youtube.com/watch?v=m3U10YopH-A
Saturday, August 30, 2008
Building linux for psp - busybox
Busybox provides many core linux utilities in a single package. Get a busybox 1.7.0 version from http://busybox.net/ .
Untar it and apply the busybox-0.21 patch from here http://jacksonm88.googlepages.com/linuxonpsp.htm
and copy the config file to /path/to/busybox/.config
use this command to customize the tools u need
make CROSS_COMPILE=mipsel-linux- LDFLAGS="-static -Wl,-elf2flt" CFLAGS="-fno-jump-tables" menuconfig
The -static option is because mmu-less systems dont support shared libraries, -Wl,-elf2flt says the compiler to convert the elf executable to flat which is supported by mmu-less systems. I didn't quite understand the use of -fno-jump-tables, but as it is mentioned in jacksons site "-fno-jump-tables is essential too as it tells gcc not to generate relocation entries of GPREL32 frequently used in jump tables".
Do the below command to locally install busybox into /path/to/busybo/_install
make CROSS_COMPILE=mipsel-linux- LDFLAGS="-static -Wl,-elf2flt" CFLAGS="-fno-jump-tables" install
If u want to install in another directory edit the install options for busybox with menuconfig.
next is we compile kernel and specify the busybox install
Sunday, August 24, 2008
Building linux for psp - getting toolchain / crosscompiler
Here i will explain how to get the psp-linux toolchain. Not that this is not the same toolchain which is used to compile homebrew applications.
1) Get the buildroot sutable for the patches 20071216 version ; but if u go to buildroot website u will not find this , so checkout a version from svn close to this
2) Get the patches from http://jacksonm88.googlepages.com/linuxonpsp.htm
3) Edit the patches to match the location of the buildroot (where you save it)
for example if my location of build root is /home/vijay/stuff/embeddedsystems/psplinux/buildroot/buildroot
u need to change the following in the patch file
/usr/src/buildroot/./toolchain_build_mipsel/gcc-4.2.1/libgomp/configure
to
/home/vijay/stuff/embeddedsystems/psplinux/buildroot/buildroot/toolchain_build_mipsel/gcc-4.2.1/libgomp/configure
edit all the patches as above
4) Now as mentioned here http://jacksonm88.googlepages.com/linuxonpsp.htm
add $(BUILDROOT)/build_mipsel/staging_dir/usr/bin/ to your search PATH by
PATH=$PATH:/path/to/buidroot/build_mipsel/staging_dir/usr/bin
This is during compilation of uclibc libraries. It searches the PATH variable for the mipsel-linux-gcc command. Basically when u type a command in terminal; linux system searches for that command in the locations defined in PATH variable.
Place the gcc,uclibc and elf2flt patches to
$(BUILDROOT)/toolchain/gcc/4.2.1/
$(BUILDROOT)/toolchain/uClibc/
$(BUILDROOT)/toolchain/elf2flt/
Buildroot applies these patches during build time.
5)Apply the buildroot patch
cd /path/to/buildroot/
patch -p1 < /path/to/buildroot-20071216.linuxonpsppatch
Now it may compile that a particular file has not found manually enter the path, just give the complete path to the file
6) configuring builroot
copy the buildroot-20071216-linuxonpsp.config to $(BUILDROOT)/
U need to change the .config file in the /path/to/buildroot folder with the above file ; this file contains the information about wht to build and all
cp /path/to/buildroot-20071216-linuxonpsp.config /path/to/buildroot/.config
use the below command from /path/to/buildroot directory to customize the options
cd /path/to/buildroot
make menuconfig
7) configuring uclibc c library
use
make uclibc-menuconfig
this will download the uclibc-0.9.29 and start menuconfig for customizing the option; just exit menuconfig for now. and copy the uclibc-0.9.29-linuxonpsp.config to the $(BUILDROOT)/toolchain_build_mipsel/uClibc-0.9.29 folder
cp /path/to/uclibc-0.9.29-linuxonpsp.config /path/to/buildroot/toolchain_build_mipsel/uClibc-0.9.29/.config
We will now again issue the make uclibc-menuconfig for customizing,
Select the below options
Target Architecture Features and Options --->
(/path/to/buildroot/toolchain_build_mipsel/linux/include)
String and Stdio Support --->
[*] Support Signed Characters In 'ctype.h' Functions.
ctype argument checking (Do not check -- unsafe) --->
uClibc development/debugging options --->
(/path/to/buildroot/build_mipsel/staging_dir/usr/bin/mipsel-linux-uclibc-)
This a resolves a error later, Enable any other options/support u require and exit the menuconfig
Now u are ready for buildind the toolchain.
8) Start building toolchain/cross compiler
cd /path/to/buildroot make source make
9) Possible problems and solutions
As mentioned here http://jacksonm88.googlepages.com/linuxonpsp.htm u may encounter one of the following problems
1) Possible issue 1:
make[4]: *** [bfd.info] Error 1
make[4]: Leaving directory `/usr/src/buildroot-20071216/toolchain_build_mipsel/binutils-2.18-build/bfd/doc'
...
make[4]: Leaving directory `/usr/src/buildroot-20071216/toolchain_build_mipsel/binutils-2.18-build/bfd'
make[3]: *** [info-recursive] Error 1
make[3]: Leaving directory `/usr/src/buildroot-20071216/toolchain_build_mipsel/binutils-2.18-build/bfd'
make[2]: *** [all-bfd] Error 2
make[2]: Leaving directory `/usr/src/buildroot-20071216/toolchain_build_mipsel/binutils-2.18-build'
make[1]: *** [all] Error 2
make[1]: Leaving directory `/usr/src/buildroot-20071216/toolchain_build_mipsel/binutils-2.18-build'
make: *** [/usr/src/buildroot-20071216/toolchain_build_mipsel/binutils-2.18-build/binutils/objdump] Error 2
Workaround:
cd /usr/src/buildroot-20071216/toolchain_build_mipsel/binutils-2.18-build/bfd/doc
makeinfo --split-size=5000000 --split-size=5000000 -I /usr/src/buildroot-20071216/toolchain_build_mipsel/binutils-2.18/bfd/doc -o bfd.info `test -f 'bfd.texinfo' || echo '/usr/src/buildroot-20071216/toolchain_build_mipsel/binutils-2.18/bfd/doc/'`bfd.texinfo
continue to run make under $(BUILDROOT)/
2) Possible issue 2:
if [ ! -e /usr/src/buildroot-20071216/build_mipsel/staging_dir/mipsel-linux-uclibc/bin/cc ]; then \
ln -snf gcc /usr/src/buildroot-20071216/build_mipsel/staging_dir/mipsel-linux-uclibc/bin/cc; \
fi
ln: creating symbolic link `/usr/src/buildroot-20071216/build_mipsel/staging_dir/mipsel-linux-uclibc/bin/cc' to `gcc': No such file or directory
make: *** [/usr/src/buildroot-20071216/toolchain_build_mipsel/gcc-4.2.1-final/.installed] Error 1
Workaround:
cd $(BUILDROOT)/build_mipsel/staging_dir/
ln -s usr/mipsel-linux-uclibc/ mipsel-linux-uclibc
continue to run make under $(BUILDROOT)/
3) Possible issue 3:
install -c /usr/src/buildroot-20071216/project_build_mipsel/linuxonpsp/root/usr/bin/ldd \
/usr/src/buildroot-20071216/build_mipsel/staging_dir/mipsel-linux-uclibc/target_utils/ldd
install: cannot stat `/usr/src/buildroot-20071216/project_build_mipsel/linuxonpsp/root/usr/bin/ldd': No such file or directory
make: *** [/usr/src/buildroot-20071216/project_build_mipsel/linuxonpsp/root/usr/bin/ldd] Error 1
Workaround:
touch $(BUILDROOT)/project_build_mipsel/linuxonpsp/root/usr/bin/ldd
continue to run make under $(BUILDROOT)/
4) Possible issue 4:
[ -f /usr/src/buildroot-20071216/build_mipsel/staging_dir/bin/mipsel-linux-uclibc-ld.real ] || \
mv /usr/src/buildroot-20071216/build_mipsel/staging_dir/bin/mipsel-linux-uclibc-ld /usr/src/buildroot-20071216/build_mipsel/staging_dir/bin/mipsel-linux-uclibc-ld.real
mv: can't stat source /usr/src/buildroot-20071216/build_mipsel/staging_dir/bin/mipsel-linux-uclibc-ld
make[1]: *** [install] Error 1
make[1]: Leaving directory `/usr/src/buildroot-20071216/toolchain_build_mipsel/elf2flt'
make: *** [/usr/src/buildroot-20071216/toolchain_build_mipsel/elf2flt/elf2flt] Error 2
Workaround:
cd $(BUILDROOT)/build_mipsel/staging_dir/bin/
ln -s `find .. -name 'mipsel-linux-uclibc-ld'` mipsel-linux-uclibc-ld
cd $(BUILDROOT)/toolchain_build_mipsel/elf2flt/
make install
continue to run make under $(BUILDROOT)/
10) Remeber if u needed to do a ( make clean and make )in the buildroot directory for rebuilding the toolchain with extra options; Issue the Steps in possible issue :4 otherwise -elf2flt support will be broken in toolchain
11) now add the /path/tp/buildroot/build_mipsel/staging_dir/usr/bin to ur PATH variable permanently by editing the .bashrc file in home directory
echo "export PATH=$PATH:/path/tp/buildroot/build_mipsel/staging_dir/usr/bin" >> ~/.bashrc
12) Now u r up with the toolchain for psp linux development :)
Sunday, August 17, 2008
Building linux for psp - Introduction
Hi recently i was looking at getting linux on to my psp and found this site.
http://jacksonm88.googlepages.com/linuxonpsp.htm
The information provided here is not enough for a noob like me to get it up from start ; I had to do a lot of twiking around, google alot ask about my problem at http://ps2.dev.org to get it up and in the process i learned alot about linux :) .
Basically getting linux on psp or embedded system for that matter, Involves the following steps
1) Get a cross compiler / toolchain
2) Get a bootloader
3) Compile a kernel with drivers
4) Get a rootfs
Before going further i would like to mentions some details about the psp hardware and its limitations for running linux. PSP has a mips microcontroller / arch mips32, mmu-less. The mmu is a important unit for any OS. Fortunately there is a branch of linux which can be run on a mmu-less processors called uClinux. But it is very limited.
The limitations of a mmu-less system as far as i understood are
- No glibc
- It does not support shared libraries.
- The executable file format should be flat, ELF is not supported.
Saturday, August 9, 2008
Qtopia phone edition on fedora-arm / arm arch
I wanted to test qtopia, but since i dont have real hardware that support embedded linux i compiled it for arm arch and tested on the fedora-arm running on qemu. have a look here
http://montamer.blogspot.com/2008/08/fedora-arm-distribution-on-qemu.html
I compiled qtopia with the following configuration options, have a look at the doc files provided with the source , the options are straight forward.
../qtopia-opensource-src-4.3.2-snapshot-20080801/configure -separate-debug-info -little-endian -arch arm -no-telephony -no-modem -no-bluetooth -no-infrared -displaysize 170mmx130mm -prefix /opt/qtopia -extra-qtopiacore-config "-embedded arm -qt-gfx-linuxfb "
edit the qtopia-opensource-src/qtopiacore/qconfig-qpe.h if u want cursor, simply comment out the no cursor options in Qtopia core section.
do "make" and "make install" which will generate a folder called "Image" where u compiled; transfer the contents in the image folder to "/opt/qtopia" directory in fedora-arm linux ; remember that i compiled with prefix "/opt/qtopia".
start the qtopia phone edition (qpe) by issuing
/opt/qtopia/bin/qpe -qws
command in fedora-arm. Play around a little with the interface :).
Porting it to a real device may be difficult maybe a little tough (i have not tried yet) . U have to adjust the parameters like which /dev/xxx to use for what; shortcut keys etc ........ have a look at "/qtopia-opensource-src/device" folder create a new folder there with custom files and adjust the '-xplatform nameoffolder' to the name of that folder.
X on fedora-arm
Im trying to get Xserver running on fedora-arm for some time to test GUI applications that i compile for arm . I didn't have that much experience with yum. I have used fedora-5 for 6 monthsand then shifted to ubuntu. I tried "yum groupinstall "X Window System"", but it didn't work as it supposed to so i have to manually select the xorg packages i have to install to get X windows running. Here is the list of packages i installed
xorg-x11-xauth
xorg-x11-apps
xorg-x11-xinit
xorg-x11-utils
xorg-x11-server-utils
xorg-x11-drv-fbdev
xorg-x11-drv-vga
xorg-x11-drv-cirrus
xorg-x11-fonts-misc
xorg-x11-fonts-75dpi
xorg-x11-server-Xvfb
xorg-x11-twm
I don't exactly know what to install and what not from above; Im just making trail and error. twm is the minimistinc window-manager. u can also install fluxbox. Remember if u issue startx it will start twm, if u want to start fluxbox instead of twm edit the xinitrc file.
Fedora-arm distribution on qemu
Qemu can emulate almost every processor. You can emulate a arm processor on qemu and install fedora-arm linux distribution on it. Look at this link for further details on how to setup.
http://fedoraproject.org/wiki/Architectures/ARM/HowToQemu .
and here is repo whr u can get arm rpm packages
http://ftp.linux.org.uk/pub/linux/arm/fedora/pub/fedora/linux/releases/8/Everything/arm/os/Packages/
It has an gcc 4.1.2 arm5vtel installed in it, so u can compile applications and test for arm, But the compilation is very slow, On my core2duo 2.13 GHz it took one and half day to compile gcc-4.2.2. :-/ .
Tuesday, July 29, 2008
Building linux for atngw100 from OE (open embedded)
You may ask why open embedded when u have buildroot. The thing is that open embedded has lots of packages that u can build. As far i know they added avr32 arch support recently.
U can get started from http://wiki.openembedded.net/index.php/Getting_Started.
My local.conf is
----------------------------------------------------------------------------------------------------------------------------------------------------------
DL_DIR = "/home/vijay/stuff/embeddedlinux/OE/stuff/sources"
BBFILES := "/home/vijay/stuff/embeddedlinux/OE/stuff/org.openembedded.dev/packages/*/*.bb"
MACHINE = "atngw100"
TARGET_OS = "linux-uclibc"
DISTRO = "angstrom-2008.1"
IMAGE_FSTYPES = "jffs2 tar ext2 ext3"
ANGSTROM_MODE = "uclibc"
PREFERRED_VERSION_uclibc ?= "0.9.29"
PREFERRED_VERSION_uclibc-initial ?= "0.9.29"
----------------------------------------------------------------------------------------------------------------------------------------------------------
I cracked my head to findout that i need to add ANGSTROM_MODE = "uclibc" and PREFERRED_VERSION_uclibc ?= "0.9.29" options ....... huh ... modify the above file to ur system convenience.
now u cam build a minimal-image for atngw100 by
bitbake minimal-image
u can have a look at org.openembedded.dev/packages/images folder for wht images u can build and org.openembedded.dev/packages for the list of packages/applications that OE can build.
Get help from #avr32 at irc.freenode.net
or http://www.avrfreaks.net
Building linux for atngw100 from buildroot
You can build linux system for ur atngw100 easily by using buildroot. There are many suppliers for buildroot
1) Atmel beta release (http://www.atmel.no/buildroot/)
2) From buildroot site (http://buildroot.uclibc.org/)
3) Some guy (http://code.google.com/p/buildroot/) mentioned in http://avr32linux.org/twiki/bin/view/Main/DevelopmentTools
I have build my system from the 3rd buildroot.
svn checkout http://buildroot.googlecode.com/svn/trunk/ buildroot-avr32
make atngw100_defconfig
make menuconfig
make
u can also use atngw100_expanded_defconfig or atngw100-base_defconfig instead of atngw100_defconfig; these add more options like lcd driver,keyboard driver, mouse driver, X-windows etc ...... if u have one attached to ur atngw100. have a look at this "buildroot-avr32/target/device/Atmel" folder; there u will find for what all devices u can build the buildroot.
I have few problems while building for atngw100_expanded_defconfig, but fortunately they were easy to solve. :D.
PS: Im yet to get my board, i was just playing around with buildroot and OE till i comes.
Cheapest evaluation board that support embedded linux (ATNGW100)
I have been searching for a evaluation board that support embedded linux; The ATNGW100 from atmel is the cheapest i could find around.Its based on avr32 - AP7000 microcontroller . Its around $80. You can build linux system and applications for this board either by buildroot or OE (open embedded). only draw back that i could say is that this doesn't have a usb host (AP7000 microcontroller); Other than that its pretty good for $80(Rs 4000). Atmel is gonna release AP720* series which has support for usb host around end of 2008 . Long time for me ,cant wait . Planning to get one of these soon :D
Sunday, July 6, 2008
Psp Linux toolchain
here is my buildroot environment i compiled for psp using instructions from http://jacksonm80.googlepages.com/linuxonpsp.htm
extract it to /usr/src and add mipsel-linux-gcc to PATH variable
1) http://rapidshare.com/files/127658821/pspbuildroot-aa.html
2)http://rapidshare.com/files/127659257/pspbuildroot-ab.html
3)http://rapidshare.com/files/127659358/pspbuildroot-ac.html
4) http://rapidshare.com/files/127659334/pspbuildroot-ad.html
5) http://rapidshare.com/files/127657597/pspbuildroot-ae.html
cat pspbuildroot-aa pspbuildroot-aa pspbuildroot-aa pspbuildroot-aa pspbuildroot-aa > buildroot-20071216.tar.bz2
Wednesday, May 28, 2008
What is Qtopia ?
Qtopia is an operation system; It can be run without a X server on the embedded system, so consumes less resources and boots faster. There are many versions of Qtopia, Initially i got frustrated finding out which is what and what is it for. There are basically two versions of qtopia one is embedded and other is phone
1) packages with the name qt-embedded-linux-opensource-src or qtopia-core-opensource-src is for embedded linux in general.
2) packages with the name qtopia-opensource-src is a phone edition.
I haven't got a chance to test the performance of qtopia on a real device. But i was testing it on fedora-arm running on qemu. It looks like developing applications for qtopia is almost like Qt (If u are familiar with KDE desktop u will be knowing that its based on qt4 ) for PC, I still have to look into it.
There are many phones and PDAs that are based on Qtopia Phone Edition; best example would be Openmoko Neo FreeRunner phone (www.openmoko.com). And almost every device that is based on embedded linux can run qtopia.
Monday, May 12, 2008
programming for psp -1 (getting started)
For those who don't know what's a PSP is , it's a handheld gaming device made by sony called as playstation portable and in short PSP. Hacker's around net have cracked the psp and created their own psp toolchain, which is a collection of headerfiles and libraries which are used to create applications programs and even games. So basically psp toolchain is a cross compiler that runs natively on a pc and used to compile programs for PSP.
Here i will be explaining how to get the psp toolchain on a linux box and get started with programming for psp.
First make sure that you have installed all the dependencies needed for compiling the toolchain
sudo apt-get install autoconf automake bison flex gcc make libncurses5-dev libusb-dev patch subversion texinfo wget build-essential
now we need to setup the environment variables; let us edit the .bashrc file in home folder; the commands in this file are executed when a terminal window is opened.
gedit ~/.bashrc
add the following two lines at the end of the .bashrc file.
export PSPDEV=/opt/pspdev
export PATH=$PATH:$PSPDEV/bin
the /opt/pspdev is the folder in which you want to install the psp toolchain. You can change it to any directory you want suppose if u want to install in /usr/local/pspdev change the line "export PSPDEV=/opt/pspdev" to "export PSPDEV=/usr/local/pspdev". We also modifid the PATH variable so as to include the /opt/pspdev/bin directory into the search path when you type a command in the terminal.
Now we need to download the psp toolchain from net and compile it. you can get it from subversion
svn checkout svn://svn.ps2dev.org/psp/trunk/psptoolchain
now change directory into the downloaded toolchain installer
cd psptoolchain
and get root access by foolowing command and entering the password
sudo su
and start the installer by
./toolchain.sh
it downloads the files necessary for toolchain from net and compile. This process takes alot of time so be patient. Once the compilation finishes you have you psp dev environment setup.
Now u may want to install basic psp libraries for advanced programming involving opengl port, mp3 ,ogg , image file support in programming. You can get the psplibraries installer from the subversion same as above.
svn checkout svn://svn.ps2dev.org/psp/trunk/psplibraries
get root access by this command, if you already have root access dont do the following command
sudo su
start the installer by
./libraries.sh
This command also takes a long time like above.
Once everything is done, you now have your PSPDEV with the basic libraries. You can get more libraries from the subversion. If you want, just download the whole psp dev trunk from ps2dev.org subversion by
svn checkout svn://svn.ps2dev.org/psp/trunk/
-----------------------------------------------------------------------------------------------------------------------------------------------------------------
OFFLINE INSTALLATION
For those who dont have a net connection or those who dont want to compile. Iam sharing my compiled toolchain. You can get it from this link Just extract it and place it anywhere (eg:- /opt/ ) on your pc .
tar -xvjf pspdev.tar.bz2
mv pspdev /opt/
and add the path to .bashrc
export PSPDEV=/opt/pspdev
export PATH=$PATH:$PSPDEV/bin
change /opt/ to location where you want to install, or just leave it as it is.
I have also shared the whole trunk of psp dev, you can get it from here
-----------------------------------------------------------------------------------------------------------------------------------------------------------------
TUTORIALS
You can get started with psp-programming now, you can find good tutorials to get started here
i have made a small filebrowser application based on above tutorials, i will be discussing about it later.
-----------------------------------------------------------------------------------------------------------------------------------------------------------------
IDE
You can use any IDE that supports makefile and c language. Iam using eclipse. See how to setup eclipse for c and c++ in this blog.
-----------------------------------------------------------------------------------------------------------------------------------------------------------------
Hope this helps to get u started programming for psp.
Thursday, May 1, 2008
Eclipse IDE simply rocks !!!
Just recently i came across this awesome application, it simply the best IDE i have seen till now . So I thought i would share with you guys. The IDE is totally customizable for any programming language (nearly every language out there, u name it :) ). The power lies in the flexibility for plugins.
U can get it from www.eclipse.org/ . Linux users simply get it from apt-get (ubuntu/debian etc....) or from yum (redhat/fedora).
sudo apt-get install eclipse
sudo yum install eclipse
After installing eclipse, we need to configure it to use java from sun microsystems (by default it uses gnu java). First we need to install jdk from sun
sudo apt-get install sun-java6-jdk
add /usr/lib/jvm/java-6-sun on the top of /etc/jvm file
sudo gedit /etc/jvm
after editing the file should look something like this (remember lines with # are just comments)
/usr/lib/jvm/java-6-sun
/usr/lib/jvm/java-gcj
/usr/lib/jvm/ia32-java-1.5.0-sun
/usr/lib/jvm/java-1.5.0-sun /usr
Make sure that /usr/lib/jvm/java-6-sun is on the topline of the file /etc/eclipse/java_home if not just add it.
sudo gedit /etc/eclipse/java_home
#/usr/lib/jvm/java-7-icedtea
/usr/lib/jvm/java-6-sun
/usr/lib/jvm/java-gcj
/usr/lib/kaffe/pthreads
/usr/lib/jvm/java-1.5.0-sun
/usr/lib/j2se/1.5
/usr/lib/j2se/1.4
/usr/lib/j2sdk1.5-ibm
/usr/lib/j2sdk1.4-ibm
/usr/lib/j2sdk1.6-sun
/usr/lib/j2sdk1.5-sun
/usr/lib/j2sdk1.4-sun
Thats all is there for setting up eclipse
I will be posting more about how to configure it for different programming languages other than java (by default) when i get time :D
Saturday, April 26, 2008
GUI design with qt4 - 1 (Basics and layouts)
BASICS AND LAYOUTS
Qt4-designer is a great cross platform application used for GUI design of applicatons, It has inbuilt programs like qmake to generate the c++ code of the GUI application, which you can modify to say what the application to do, when clicked on a button or so . U can get it on ubuntu by apt-get
"sudo apt-get install qt4-designer qt4-dev-tools qt4-doc"
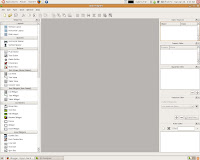
The above command installs qt4 with documentation on ur system. Now when u open qt4-designer from Applications->Programming->Qt4 Designer u will see the that all the windows scattered around the desktop, If u want to keep the application intact.
Now we create a new layout by selecting New form from main menu (file->newform). which gives an option in selecting the default design
After selecting the design, u can just drag and drop widgets (combobox,text edit , line edit, etc....... which u see in the left column)on to the main GUI window. just play around with them. If at anytime u want to see how your application looks in the end choose form->preview from the toolbar
U might have observed that the widgets doesn't resize when you resize the main window; that's where LAYOUTS comes into picture. In the tool bar you will be able to see these buttons (horizontal, vertial , horizontal with seperation , vertical wiith seperation and grid). Select the widgets that you want to align and click on these buttons to allign them according to your requirement (so simple right :D). U will be seeing a red box surrrounding it (just to indicated that they are in layout) . Now if u want the widgets to get resized when u resize the main window, select anywhere on the main window and apply a layout. You can remove a layout at anytime by selecting the layout and clicking on the 6th button in the above pic.
Play around with the layouts and the widgets to get the final form of your application's gui. Keep a track of the property editor where u can edit the properties of widgets, layouts, spacing, etc .......
Qt4-designer is a great cross platform application used for GUI design of applicatons, It has inbuilt programs like qmake to generate the c++ code of the GUI application, which you can modify to say what the application to do, when clicked on a button or so . U can get it on ubuntu by apt-get
"sudo apt-get install qt4-designer qt4-dev-tools qt4-doc"
The above command installs qt4 with documentation on ur system. Now when u open qt4-designer from Applications->Programming->Qt4 Designer u will see the that all the windows scattered around the desktop, If u want to keep the application intact.
- close the new form window.
- go to Edit->preferences->(in User interface mode change option from Multiple Top-Level windows to Docked).
Now we create a new layout by selecting New form from main menu (file->newform). which gives an option in selecting the default design
After selecting the design, u can just drag and drop widgets (combobox,text edit , line edit, etc....... which u see in the left column)on to the main GUI window. just play around with them. If at anytime u want to see how your application looks in the end choose form->preview from the toolbar
U might have observed that the widgets doesn't resize when you resize the main window; that's where LAYOUTS comes into picture. In the tool bar you will be able to see these buttons (horizontal, vertial , horizontal with seperation , vertical wiith seperation and grid). Select the widgets that you want to align and click on these buttons to allign them according to your requirement (so simple right :D). U will be seeing a red box surrrounding it (just to indicated that they are in layout) . Now if u want the widgets to get resized when u resize the main window, select anywhere on the main window and apply a layout. You can remove a layout at anytime by selecting the layout and clicking on the 6th button in the above pic.
Play around with the layouts and the widgets to get the final form of your application's gui. Keep a track of the property editor where u can edit the properties of widgets, layouts, spacing, etc .......
- Property editor : u can edit the properties of the widgets like size behaviour name etc .....
- signal/slot editor : control the inner connections between the widgets
- Object inspector : shows the list of the widgets placed and how they are linked
- Widget box : contains all the widgets to be placed,
- Resource editor : All the icons data are store in seperate file than in the ui file, add icons to ur resource file.
Ubuntu 8.04 codename "Hardy Heron" released
As promised ubuntu team released its long term supported "Hardy Heron" on 24th april 2008 , which has a life span of 3 years unlike gutsy which is of 18 months. There are no major changes from gutsy, however there are still some minor upgrades :
For the first time sound in vmware is woking ..... kudoos to it :P
Caution: Don't upgrade from 7.10 to 8.04 , either do a fresh install of 8.04 or stick with 7.10. I don't know the reasons but i obeserve slow in the system when i upgraded, so i did a fresh install of 8.04 .
OVERALL:
Ubuntu 8.04 is a great release and lives up to the expectations. So far i faced no problems. ubuntu will be continuing its 6 months releases; the next one is gonna be 8.10 (Intrepid Ibex) scheduled in sometime october.
- Kernel 2.6.24-16
- Gnome 2.22.1
- Transmission replaces the default gnome-bittorrent.
- Vinagre(remote desktop viewer) replaces the default vncviewer.
- Brasero cd/dvd burning application replacing the Serpentine audio cd burning utility.
- GVFS is included in nautilus replacing GnomeVFS
- Firefox-3 beta 5 replacing firefox-2
- Policykit utility added.
- Pulse audio by default.
- Upgrade in world clock applet, now can display time and weather at multiple locations.
- The old boring wallpaper and login screen are now replaced :D; but the brown and orange color scheme remains the same. And there are few minor changes in the look and feel.
For the first time sound in vmware is woking ..... kudoos to it :P
Caution: Don't upgrade from 7.10 to 8.04 , either do a fresh install of 8.04 or stick with 7.10. I don't know the reasons but i obeserve slow in the system when i upgraded, so i did a fresh install of 8.04 .
OVERALL:
Ubuntu 8.04 is a great release and lives up to the expectations. So far i faced no problems. ubuntu will be continuing its 6 months releases; the next one is gonna be 8.10 (Intrepid Ibex) scheduled in sometime october.
Subscribe to:
Posts (Atom)